(continued from Supplier FYI Messages)
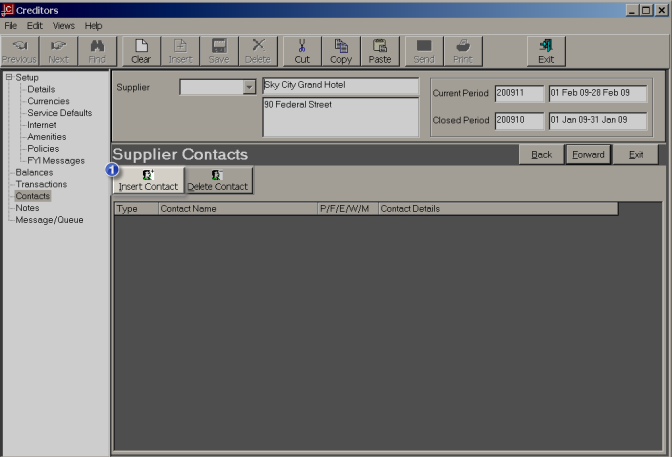
This screen enables contacts to be added, changed and deleted for a supplier. Supplier contacts are used in Tourplan’s messaging system to provide an automated phonebook when messages are sent by email or fax to a supplier. Prior to the setup of a contact a list of standard contact types must be set up in the Tourplan CodeMaint module.
Screen Shot 24: Insert Supplier Contact

Insert Contact
To add a contact click on the Insert Contact button  . The Contact Details dialogue will display.
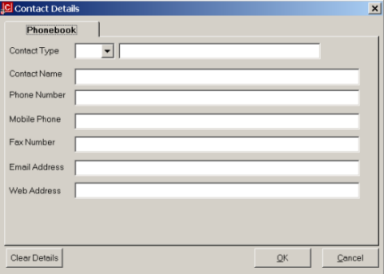
Screen Shot 25: Contact Details Dialogue

Contact Type
The type of contact. Types of contacts could be:
Contact Name
The full name of the contact e.g. Ms Catherine Watson. A generic name can be used if required - e.g. Reservations.
Phone Number
The phone number for this contact. The number can be different to other contacts for this supplier.
Mobile Phone
The Contacts mobile or alternate phone number
Fax Number
The fax number for this contact. This number is available in the Bookings Messaging sub system for faxing messages to this contact at the supplier. The number can be different to other contacts at this supplier.
Email Address
The email address for this contact.
Web Address
The web address for this supplier (optional).
Ok
When the above entries have been completed, click the OK button to save the contact details. The Contact name field will be cleared and details of the next contact for this supplier can be entered. Phone, Fax, email and web details are retained, but can be overridden if necessary.
Cancel
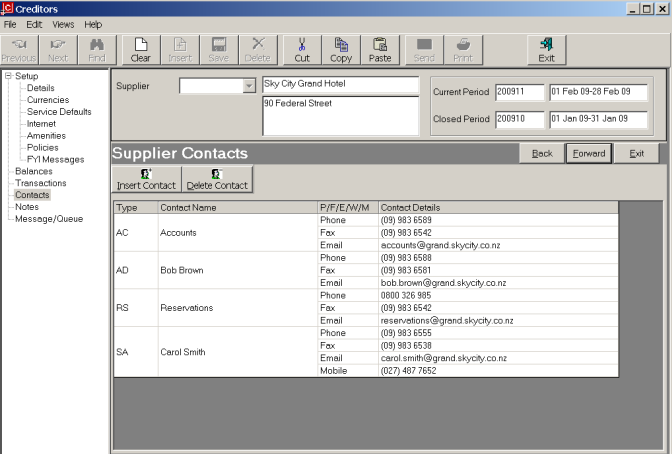
When entry of all contacts for this supplier have been completed, click the Cancel button to return to the Supplier Contacts screen where a list of the contacts is now displayed.
Clear Details
To clear completely the details from the dialogue, click the Clear Details button
Screen Shot 26: Example Completed Contacts Screen

|
|
To change the details of a contact double click on one of those listed and edit the fields as required. |
|
|
To delete a contact from this list highlight one of the listed contacts for this supplier, click on the Delete Contact button and click the Yes Button when prompted. |
Forward
To continue setting up the supplier, click the ‘Forward’ button on the Wizard bar. This will display the Supplier Notes screen.
Exist
To cancel setting up the creditor, click the ‘Exit’ button on the Wizard bar.
Back
If any item on previous screens needs correcting, use the ‘Back’ button on the Wizard bar